Home & Garden
Step-by-Step Guide for Installation Process of Thermoplastic Olefin (TPO) Roofs by Experts
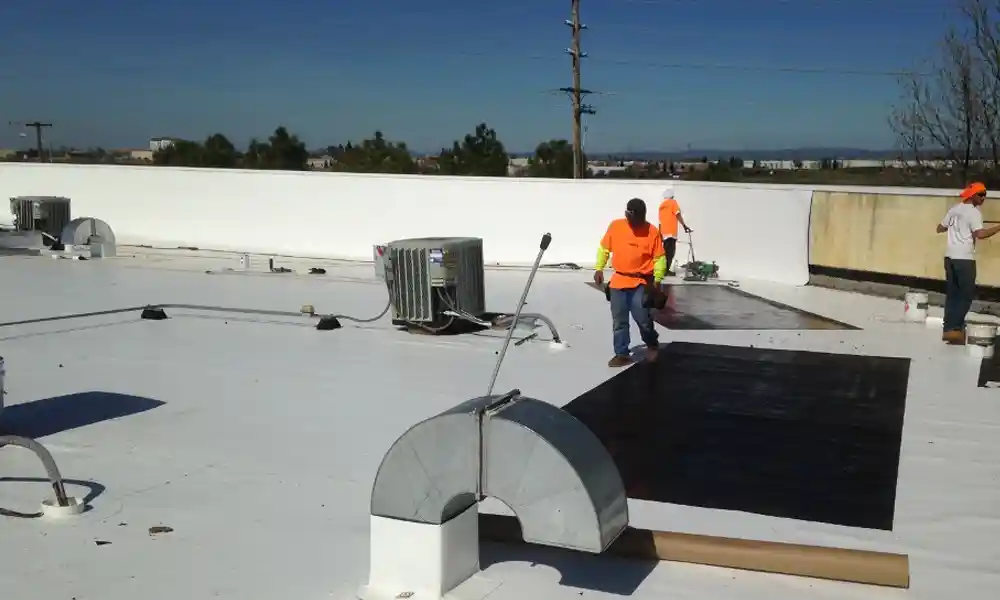
Are you thinking of installing a durable and energy-efficient roofing solution? Thermoplastic Olefin (TPO) roofs have grown in popularity due to their versatility and cost-effectiveness. But how does one go about installing them correctly? Whether you’re a homeowner looking to upgrade your roof or a contractor seeking guidance, this comprehensive step-by-step guide will walk you through the installation process. Ready to learn how to install a long-lasting roof solution? Let’s dive in!
What is Thermoplastic Olefin (TPO) Roofing?
Before starting the installation process, it’s essential to understand a few Thermoplastic Olefin roof insights. TPO roofing is a single-ply membrane commonly used in commercial and residential flat roofs. Known for its reflective properties, it helps reduce energy costs by reflecting UV rays, making it an eco-friendly option. The membrane is also resistant to weather damage, such as punctures, tears, and algae growth, which adds to its appeal.
The thermoplastic olefin (TPO) roof insights lie in its construction, which typically consists of a polypropylene and ethylene-propylene rubber blend. This combination offers high performance at an affordable price.
Step 1: Preparation of the Roof Deck
The first step is preparing the roof deck. This involves clearing debris, checking for damage, and making necessary repairs. A clean and solid foundation ensures the TPO membrane adheres properly and maximizes its lifespan.
After clearing the surface, apply insulation material to enhance the roof’s thermal efficiency. Common choices include polyisocyanurate (ISO) and expanded polystyrene (EPS). The insulation should be secured firmly using mechanical fasteners or adhesive.
Step 2: Rolling Out the TPO Membrane
The next step is to roll out the TPO membrane across the prepared deck. Ensuring the material is positioned correctly without any wrinkles or folds is critical. Start from the roof’s lowest point and work upward to ensure proper water drainage.
As you roll out the membrane, align it with the roof edges and leave a slight overhang that can be trimmed later for a neat finish. Avoid stretching the material excessively, as this can lead to stress points, which could shorten the lifespan.
Step 3: Securing the Membrane
Once the TPO membrane is rolled out, it’s time to secure it. Two standard methods for this are mechanical fastening and fully adhered systems. In the mechanical fastening method, fasteners anchor the membrane to the roof deck. These fasteners should be evenly spaced to prevent membrane uplift from wind forces.
The fasteners are typically placed along the seams of the TPO sheets to maintain a seamless appearance. A membrane is glued directly to the insulation or substrate using a bonding adhesive for a fully adhered system. This method is preferred for roofs with irregular shapes or those in high-wind areas, as it provides extra stability.
Step 4: Sealing the Seams
Sealing the seams is the most crucial part of the installation process, as gaps or imperfections can lead to leaks. The seams between the TPO sheets must be heat-welded to form a waterproof seal. A specialized heat gun or welding tool fuses the sheets, ensuring a durable bond.
Scrutinize the seams after welding, as improper sealing can compromise the roof’s performance. Experts recommend using a seam probe to check for weak spots needing re-welding.
Step 5: Installing Flashing and Trims
Flashing and trims are installed at the roof’s edges and around any penetrations, such as vents, chimneys, or skylights. These accessories help ensure that water does not seep into vulnerable areas and cause damage to the structure.
The flashing should be carefully heat-welded to the membrane for a professional finish, and any excess material should be trimmed. Proper flashing installation is crucial for maintaining the roof’s waterproofing capabilities.
Precision and attention to detail are critical for ensuring a long-lasting and effective solution when installing a thermoplastic olefin roof. Each step must be carefully executed, whether you’re using mechanical fasteners or adhesives. These thermoplastic olefin roof insights regarding the steps can come in handy with homeowners. However, it is best to hire professional contractors to install a durable and efficient TPO roof.
Looking for a propane service that is safe and affordable? Running out of propane can be a hassle. A reliable delivery service keeps your home or business running smoothly. Safe handling ensures no risks or delays.
Affordable pricing helps you save money. Timely service means you never have to wait too long. The right provider makes everything easy and stress-free. Want to know how to get the best propane delivery? Keep reading to learn more!
Reliable Propane Delivery
Reliable propane delivery ensures you never run out of fuel. It keeps homes warm and businesses running smoothly. A good provider delivers on time without delays. Safe handling prevents leaks and other risks.
Regular propane supply helps avoid last-minute emergencies. Affordable pricing makes it a cost-effective choice. Customers can schedule deliveries for added convenience. Timely service means you always have fuel when needed. Choosing a trusted propane provider makes life easier.
Safe and Secure Service
Safe and secure service means getting what you need without worry. Reliable companies follow strict safety rules to protect customers. They use trained professionals and quality equipment to handle every delivery with care.
Services like propane delivery in Pennsylvania and Delaware ensure fuel arrives safely and on time . Safety checks and proper handling prevent leaks and accidents.
Customers can trust that their orders will be delivered without risk. With careful planning and expert service, businesses and homes stay powered without concerns.
Timely Fuel Supply
A timely fuel supply ensures you never run out of propane. It keeps homes warm and businesses running smoothly. A good provider delivers propane on schedule. This helps avoid last-minute shortages and delays. Reliable service means you always have the fuel you need.
Safe handling ensures proper delivery every time. Affordable pricing makes propane a smart choice. Customers can set up regular deliveries for convenience. A trusted provider makes fuel supply easy and stress-free.
Affordable Pricing Options
Affordable pricing options make propane delivery budget-friendly. Customers can choose plans that fit their needs. Fixed rates help avoid price spikes. Discounts may be available for regular deliveries. Paying in installments makes costs easier to manage.
Affordable propane keeps homes and businesses running smoothly. Safe delivery is always included in the price. A good provider offers fair and transparent pricing. Reliable service does not have to be expensive.
Hassle-Free Propane Solutions
Hassle-free propane solutions make fuel delivery easy. Customers can set up automatic deliveries. This prevents last-minute shortages and stress. Online ordering makes scheduling simple. Safe and timely service ensures reliable propane supply.
Affordable pricing keeps costs under control. Professional handling reduces risks and worries. Regular maintenance helps keep tanks in good condition. A trusted provider makes propane delivery smooth and easy.
Learn More About Propane Delivery
Propane delivery provides a steady fuel supply for homes and businesses. Reliable service ensures you never run out. Safe handling keeps people and property protected. Affordable pricing makes propane a cost-effective choice.
Timely deliveries prevent last-minute shortages. Hassle-free options make ordering simple. Choosing a trusted provider gives peace of mind. Propane delivery makes heating and cooking easy.
Visit our blog for more!
Are you curious about how homes can become more energy-efficient and eco-friendly?
Sustainable electrical installations are changing the way we power our homes. From solar panels to energy-saving systems, these updates help reduce energy costs and environmental impact.
As technology advances, homeowners are finding new ways to make their homes smarter and greener. In the coming years, more people will turn to sustainable solutions to create homes that benefit both them and the planet.
Let’s explore the top trends in sustainable electrical systems for modern homes.
Solar Panel Integration
Solar panels are becoming a common choice for homes. They use sunlight to create electricity, which helps save money and energy.
With solar panels, you can reduce your reliance on electricity from the grid. This is good for the environment because it lowers the use of fossil fuels.
Many homes are installing solar panels to power their lights and appliances. In areas with lots of sunlight, solar energy is a great way to stay green and cut costs. Over time, the savings on electricity bills can pay for the system.
Energy-Efficient Lighting
Energy-efficient lighting helps homes use less electricity. LED lights are a popular choice. They last longer and use less energy than regular bulbs. This means homeowners save money on their energy bills.
These lights are also better for the environment. They use less power, which lowers the energy demand. As more people use energy-efficient lighting, it reduces the need for power plants and helps protect nature.
Smart Home Technology
Smart home technology is growing in popularity. It includes devices that help manage energy use in the home.
For example, smart thermostats adjust the temperature to save energy. Smart lights turn on and off based on movement or schedule.
In Montgomery County, many homeowners are using smart technology to control their homes more efficiently. These systems can make a home more energy-efficient, which saves money. Smart homes can be controlled from phones or tablets, making it easy to manage everything at once.
Battery Storage Systems
Battery storage systems store electricity for later use. These systems are helpful when using solar power.
When the sun isn’t shining, the stored energy can be used to power a home. This means homes can rely on their energy even at night or on cloudy days.
These batteries are becoming more popular in homes with solar panels. They allow homeowners to use their stored energy instead of buying power from the grid. This reduces energy bills and supports sustainable living.
Electric Vehicle Charging Stations
Electric vehicle (EV) charging stations are key to supporting green transportation. As more people drive electric cars, home charging stations make it easier to charge at home. These stations are fast, easy to use, and save time.
Having an EV charging station at home is convenient for those with electric cars. In Montgomery County, many homeowners are adding charging stations to their homes. This trend supports cleaner energy use and encourages the switch to electric vehicles.
A Greener Future for Homes
Sustainable home electrical installations are changing how we live. With the rise of new technologies, homes are becoming more energy-efficient and eco-friendly.
People are finding ways to save money while also protecting the environment. As we move toward a cleaner future, these changes will help reduce our carbon footprint.
Choosing to make your home more sustainable benefits both you and the planet. Small changes can make a big difference, and everyone has a role to play in creating a greener, more energy-efficient world.
For more informative articles, please visit the rest of our blog.
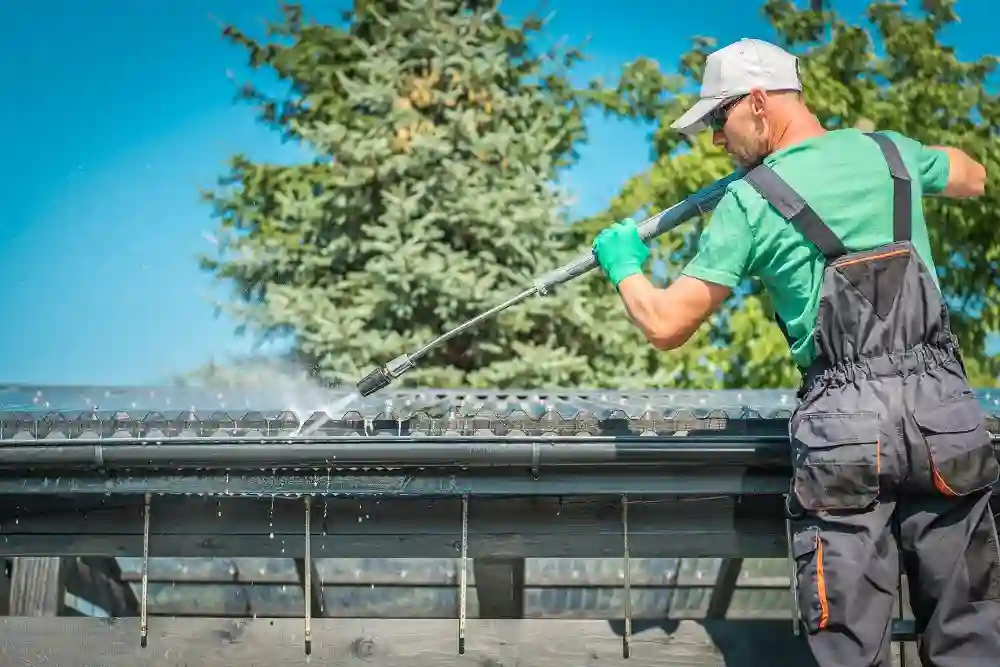
Your roof does more than just cover your home-it shields you from the elements and plays a big role in your home’s overall appearance and value. Over time, dirt, moss, algae, and mold can build up, causing damage and making your home look older than it really is. Without proper care, your roof may weaken, leading to leaks, costly repairs, and even structural issues.
A clean roof not only enhances curb appeal but also extends its lifespan, saving you money in the long run. Don’t wait until damage becomes a major problem-take action now with safe, eco-friendly roof cleaning solutions that protect both your home and the environment!
The Problem with Harsh Chemicals
Many cleaning products have harsh chemicals that can harm the environment. These chemicals can wash off roofs and seep into the ground. This affects plants, animals, and water sources.
What to Look for in Safe Cleaning Products
Pick a roof cleaning product that shows it’s biodegradable or non-toxic on the label. Natural or plant-based formulas are usually better for the environment. Stay away from products with bleach, ammonia, or harsh acids.
These can harm nearby plants and pollute water. Check for eco-friendly certifications to ensure safety. Some products contain hydrogen peroxide or citrus ingredients. These work well to break down mold and algae without causing damage.
Benefits of Using Eco-Friendly Cleaners
Environmentally safe roof cleaners are effective and safe for nature. They help remove dirt, mold, and algae without causing pollution. These products also reduce health risks from strong chemical fumes.
Natural cleaners can extend your roof’s life by preventing damage from harsh chemicals. Homeowners who choose eco-friendly methods often see their roofs stay cleaner longer. This is because gentle products do not strip protective coatings on shingles.
How to Use Eco-Friendly Roof Cleaners
Using green cleaning products is easy and effective. Many come as ready-to-use sprays, needing little effort. Some require mixing with water before use. A soft-bristle brush or a low-pressure washer can remove tough debris.
Preventing Future Roof Build-Up
Cleaning your roof isn’t just a one-time task. Reliable roof cleaning can stop dirt and mold from returning. Trimming tree branches near your home cuts down on debris on your roof.
Cleaning gutters often helps prevent moisture buildup, which can cause mold. Adding zinc or copper strips along the roof ridge can naturally stop algae and moss growth.
These metals release ions that keep mold and mildew from spreading. Simple actions like these really help keep your roof clean and healthy.
Choosing the Right Professionals
If you prefer professional cleaning, select companies that use eco-friendly methods. Many roofing experts provide green cleaning options. These are safe for both your home and the environment.
Inquire about the products they use and confirm their adherence to eco-friendly practices. A reliable company will share information about its cleaning methods.
By choosing a sustainable company, you help keep your home clean and the planet safe. To find a trustworthy service, check online reviews and ask for recommendations.
Protect Your Home and the Environment
Choosing eco-friendly roof cleaning products helps keep your home in good shape and protects nature. By using green cleaners and safe cleaning methods, you can enjoy a clean roof without harming the environment.
Making these choices benefits your home, family, and the planet. A clean roof looks great and lasts longer, saving you money over time. Switching to eco-friendly cleaning products is an easy yet effective way to care for your home and be kind to nature.
For more on this content, visit the rest of our blog!

Xilonen: Genshin Impact’s Master Craftsman and Geo Character

The Pulley Poem Appreciation: A Deep Dive (With a Few Winks)

Dandy’s World Characters: Playable Toons and Key Features

In-Depth Appreciation of the Poem All the World’s a Stage

Fallout 4 Perks: Unlock New Skills and Power Up Your Character

Appreciation of “Where the Mind Is Without Fear”: Central Idea

Landman Cast: Unveiling the Stars of West Texas Oil Rigs

Essay on My Favourite Game Cricket: A Complete Guide

Curly Mouthwashing: A Story of Risk, Change, and Discovery

11 Best Super Skinny Cartoon Characters of All Time
-
 Travel1 year ago
Onboardicafe.com Login Exploring the Delights of Onboardicafe
-
 Food & Recipes1 year ago
Five Food Products You Must Avoid Giving to Your Infant
-
 Sports1 year ago
The Most Popular Sports In The World
-
 Sports11 months ago
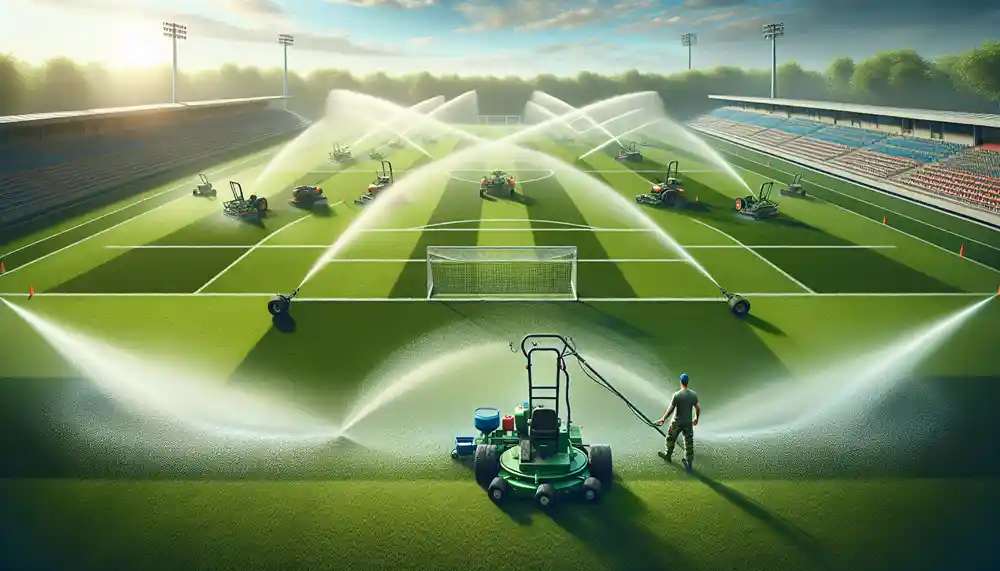
Smart Solutions for Football Field Maintenance
-

 Technology6 months ago
Sustainable Practices in Video Production: Reducing the Carbon Footprint
-
 Health & Fitness12 months ago
Suboxone Tooth Decay Lawsuits and the Pursuit of Justice Against Indivior
-
 Entertainment1 year ago
Navigating the Web: The Ultimate List of Tamilrockers Proxy Alternatives
-
 Sports10 months ago
Wearable Tech and the Future of Football